


Industry News, News
Illuminate Your Space: A Guide on How to Light a Japanese Lantern Safely and Effectively
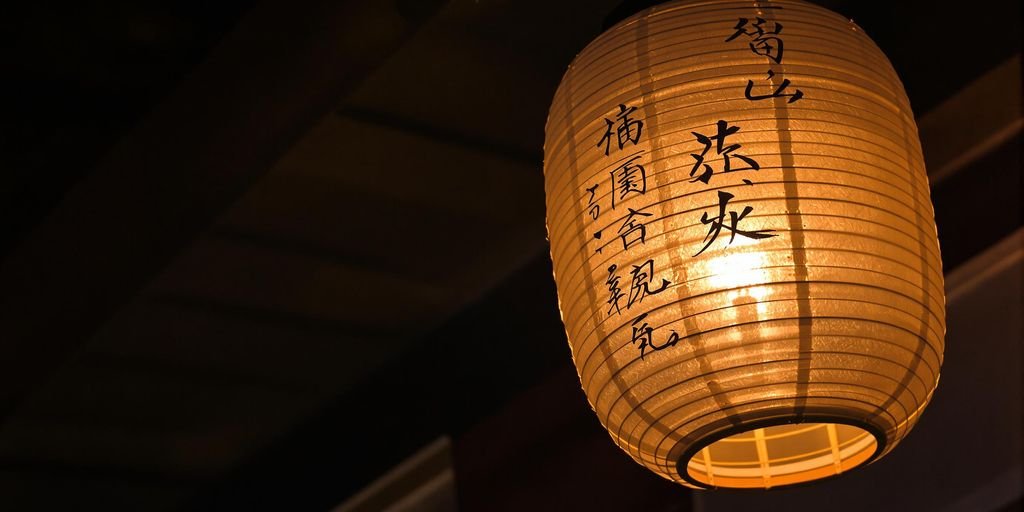
Japanese lanterns are cool, adding a nice, peaceful vibe to any spot. But figuring out how to light a Japanese lantern can be a bit tricky. You want them to look good, but also be safe. This guide will walk you through the different ways to light them up, whether you like modern tech or something more traditional. We’ll cover everything so your lanterns shine just right.
Key Takeaways
- There are three main ways to light Japanese lanterns: LED, solar, and good old-fashioned candles.
- When picking LEDs, think about how bright you want them, the color of the light, and how much energy they’ll use.
- For solar lanterns, put them where they’ll get lots of sun during the day so they charge up well. Also, know how tough they are against different weather.
- If you’re using candles, make sure to pick the right size for your lantern. This helps with safety and makes the light look best.
- Always follow the steps for your chosen lighting method to make sure your lantern is lit safely and looks great.
Lighting Methods for Japanese Lanterns
So, you’re thinking about lighting up a Japanese lantern? Awesome! There are a few ways to do it, each with its own vibe and set of pros and cons. We’re going to break down the three main methods: LEDs, solar power, and good old-fashioned candles. Let’s get into it.
LED System
LEDs are the modern choice. They’re energy-efficient, last a long time, and you can even get them in different colors. Plus, no open flame to worry about! LEDs are great if you want a consistent, safe light source. You can find battery-operated LEDs or even ones you plug in. It depends on where you plan to put your lantern and how much light you want.
Solar System
Solar-powered lanterns are super cool because they’re eco-friendly. They charge during the day and then light up automatically at night. It’s like magic! Of course, they need sunlight to work, so if you live somewhere cloudy, this might not be the best option. But if you’ve got a sunny spot, solar charge is a fantastic way to go. Here’s a quick rundown:
- Eco-friendly and sustainable
- Automatic operation at night
- No need for batteries or outlets
Solar lanterns are a great way to add light to your garden without increasing your electricity bill. Just make sure they get enough sunlight during the day to fully charge.
Candles
Nothing beats the ambiance of a real candle. It’s classic, romantic, and gives off a warm, flickering glow. But, of course, you have to be careful with fire. Make sure you use the right size candle for your lantern and never leave it unattended. It’s all about creating that perfect mood while staying safe. When using candles, consider these points:
- Use appropriately sized candles
- Never leave unattended
- Place on a stable, heat-resistant surface
Choosing the Right LED Setup for Your Japanese Lantern
So, you’re thinking about using LEDs for your Japanese lantern? Great choice! They’re super convenient and last a long time. But before you just grab any old LED, let’s talk about picking the right setup. It’s not rocket science, but a little planning goes a long way in getting that perfect glow.

Choosing the Right LED Setup for Your Japanese Lantern
Choosing the Right LED Bulbs
Okay, first things first: the bulb itself. Brightness is key, but you don’t want it too bright. Think soft, ambient light, not stadium lighting. Lumens are what measure brightness, so look for something that’s not too high. Color temperature is also important. If you want that warm, cozy feel, go for something around 2700 K. That’s similar to candlelight. And of course, energy efficiency is a plus. You don’t want to be changing bulbs every other week, right? Plus, it’s better for the environment.
Here’s a quick rundown:
- Brightness: Aim for a soft glow, not overpowering light.
- Color Temperature: 2700K for a warm, candle-like ambiance.
- Energy Efficiency: Look for LEDs that save energy and last longer.
Customers praise these LED bulbs for their ease of use and ideal size, finding them perfect for paper lanterns and dioramas.
Installation Tips and Safety
Alright, you’ve got your bulbs. Now, let’s talk about putting them in. First and foremost: safety first! Make sure the lantern is off, or even better, unplugged if it has a cord. You don’t want any accidental shocks. If you’re not comfortable with basic electrical stuff, maybe ask a friend who is, or even call an electrician. It’s better to be safe than sorry. When you’re putting the bulb in, don’t force it. If it doesn’t screw in easily, check the size and make sure it’s the right one. And finally, make sure the bulb is secure, but not too tight. You don’t want to crack the lantern or the bulb.
When installing, always make sure the power is off. Double-check everything before you turn it back on. It’s a simple step that can save you a lot of trouble. Also, consider using a diffuser if the light is too harsh. It’ll soften the glow and make it more pleasant.
Harnessing Solar Power for Your Japanese Lantern
Solar power is a fantastic way to light up your Japanese lanterns, blending eco-friendliness with convenience. It’s a set-it-and-forget-it kind of deal, which is great for busy folks. Plus, you’re not contributing to pollution, which is always a win!

Harnessing Solar Power for Your Japanese Lantern
Optimizing Solar Charge during the Day
To get the most out of your solar-powered lantern, placement is key. You want to make sure the solar panel gets as much direct sunlight as possible. Here are a few things I’ve learned:
- Positioning: Face the solar panel south (in the Northern Hemisphere) for maximum sun exposure. Adjust the angle seasonally to catch more direct rays.
- Clearance: Make sure trees, buildings, or anything else don’t block the sunlight during peak hours (usually between 10 am and 4 pm).
- Cleaning: Keep the solar panel clean! Dust, dirt, and bird droppings can reduce its efficiency. A quick wipe with a damp cloth now and then does the trick. You can find more information on solar panels online.
I’ve found that even on cloudy days, my solar lanterns still gather some charge, but it’s significantly less. On a full sunny day, they can last all night, but on a cloudy day, they might only shine for a few hours. It’s something to keep in mind if you’re planning an outdoor event.
Understanding Solar-powered Lantern Durability
Solar-powered lanterns are pretty durable, but they’re not indestructible. Here’s what to expect:
- Battery Life: The batteries in solar lanterns usually last for 1-2 years. You’ll know it’s time to replace them when the lantern doesn’t stay lit as long as it used to. Replacements are usually easy to find and install.
- Panel Longevity: The solar panel itself can last for several years, but it can degrade over time, especially if exposed to harsh weather. Look for lanterns with UV-resistant panels for better durability.
- Weather Resistance: Most solar lanterns are designed to withstand rain and snow, but it’s still a good idea to bring them inside during extreme weather events like hurricanes or blizzards. This will help prolong their lifespan. Consider the serene Japanese garden aesthetics when placing your lanterns.
Here’s a quick table summarizing the typical lifespan of components:
| Component | Typical Lifespan | Notes |
|---|---|---|
| Solar Panel | 3-5 years | Can degrade in harsh weather; UV-resistant panels last longer. |
| Battery | 1-2 years | Needs replacement when lighting duration decreases. |
| Lantern Body | Varies | Depends on material; protect from extreme weather for longer life. |
Embracing Traditional Candles for Your Japanese Lantern
There’s something undeniably special about using candles to light a Japanese lantern. It’s a nod to tradition, a way to connect with the past, and it creates a unique ambiance that modern lighting just can’t replicate. But it’s important to do it safely and effectively.
Selecting Candles for Different Lantern Sizes
Choosing the right candle size is key. You don’t want a tiny tea light in a large lantern, or a huge pillar candle crammed into a small one. It’s all about proportion and safety. Here’s a quick guide:
- Small Lanterns (under 8 inches): Tea lights or small votive candles work best. They provide a gentle glow without overheating the lantern.
- Medium Lanterns (8-12 inches): Votive candles or small pillar candles are a good choice. Make sure there’s enough space around the candle for ventilation.
- Large Lanterns (over 12 inches): Pillar candles are ideal, but always ensure the lantern is stable and the candle is placed securely. Consider using a candle holder to prevent accidents.
Always use unscented candles. Scented candles can sometimes produce soot or release chemicals that could damage the lantern or affect the air quality.
Candle Placement for Optimal Lighting
Where you place the candle inside the lantern makes a big difference in how the light is distributed. Here are a few tips:
- Center Placement: Placing the candle in the center of the lantern usually provides the most even light distribution.
- Off-Center Placement: If you want to create a specific shadow effect, try placing the candle slightly off-center.
- Multiple Candles: For larger lanterns, consider using multiple smaller candles to create a brighter and more balanced light. Just be sure to space them out evenly.
The type of wax also matters. Beeswax and soy wax candles tend to burn cleaner and longer than paraffin candles, which can produce more soot. Plus, they’re often more eco-friendly. Always supervise burning candles.
The Art of Lighting Lantern Candles
Lighting a candle in a Japanese lantern is more than just striking a match. It’s about creating an atmosphere. Here’s how to do it right:
- Prepare the Lantern: Make sure the lantern is clean and free of any debris. Check for any tears or damage to the paper.
- Secure the Candle: Place the candle in a stable holder or on a heat-resistant surface inside the lantern.
- Light Carefully: Use a long match or lighter to avoid burning your fingers. Light the wick and let the candle burn for a few minutes to establish a good flame.
Extinguishing Candles and Aftercare
Extinguishing candles safely is just as important as lighting them. Never blow out a candle in a lantern, as this can cause hot wax to splatter or damage the lantern. Instead, use a candle snuffer to extinguish the flame. After the candle has been extinguished, allow the lantern to cool completely before handling it. Regularly clean the inside of the lantern to remove any soot or wax residue. This will help to keep your traditional Japanese chochin lanterns looking their best and ensure they last for years to come.
Step-by-Step Guide to Lighting Japanese Lanterns
Lighting a Japanese lantern can really bring a sense of calm. Whether you’re trying to light up a walkway, make a cool focal point in your yard, or just set a chill mood for the evening, knowing the steps to light your lantern is key. Here’s how to do it right, no matter what kind of light you’re using.
LED System
LEDs are a great modern way to light up your Japanese lanterns. They’re awesome if you want that classic look without having to deal with candles or waiting for the sun to charge up solar panels. Here’s how to do it:
- Make sure you have the right LED bulb for your lantern. Check the lantern’s specs to know what wattage and size bulb to get. You don’t want to overload it or have a bulb that doesn’t fit.
- Carefully open up your lantern. Most have a way to open at the top or bottom. Be gentle so you don’t rip the paper or damage the frame.
- Screw in the LED bulb. If it’s a string of lights, arrange them inside so they spread the light evenly. You might need some tape to hold them in place.
- Close up the lantern and turn on the lights. If everything’s working, you should have a nice, evenly lit lantern.
Solar System
Solar-powered lanterns are super convenient and good for the environment. Here’s how to get them going:
- Find a good spot for the solar panel. It needs to be somewhere that gets a lot of sunlight during the day. South-facing is usually best.
- Connect the solar panel to the lantern. Most have a wire that plugs right in. Make sure it’s a secure connection.
- Let the lantern charge in the sun. It usually takes a full day to get a good charge. Check the instructions for how long it needs.
- Once it’s charged, the lantern should automatically turn on when it gets dark. Some have an on/off switch if you want to control it manually.
Candles
Using candles gives you that classic, warm glow. But you have to be careful! Here’s how to do it safely:
- Choose the right size candle for your lantern. You don’t want it to be too tall or too wide. A small votive or tea light usually works well. Consider using citronella candles to keep bugs away.
- Place the candle in a candle holder inside the lantern. This will keep it from tipping over and starting a fire.
- Light the candle with a long match or lighter. Be careful not to burn yourself.
- Make sure the lantern is on a stable surface away from anything that could catch fire. Never leave a lit candle unattended!
Always keep a close eye on any open flames. Never leave a lit candle unattended, and make sure it’s placed on a stable, heat-resistant surface. Keep flammable materials away from the lantern to prevent accidents.
Installing LED Lights in Your Japanese Lantern
So, you’ve decided to go with LEDs for your Japanese lantern? Great choice! They’re super energy-efficient and last ages. Plus, no open flame to worry about. Let’s get those lights installed.
Step-by-Step LED Installation
Okay, first things first: make sure you have all your stuff ready. You’ll need your LED lights (obviously), maybe some wire strippers if you’re doing any wiring yourself, and possibly some electrical tape. Oh, and round paper lanterns, of course!
Here’s a simple breakdown:
- Turn off the power! Seriously, don’t skip this. Safety first.
- If you’re using plug-in LEDs, just thread the wire through the lantern’s opening and position the bulb where you want it. If you’re wiring something yourself, strip the ends of the wires and connect them to the LED, using electrical tape to secure the connections.
- Carefully arrange the wiring inside the lantern so it’s not putting any stress on the connections.
- Hang the lantern and plug it in (or turn on the switch if it’s battery-powered).
I remember the first time I tried this, I didn’t secure the wires properly, and the light kept flickering. It was so annoying! Make sure everything is snug and secure, and you’ll be golden.
Switching On and Troubleshooting
Alright, you’ve got everything hooked up, and it’s time to flip the switch. Fingers crossed!
- If the light doesn’t turn on, double-check that the power is on and that all the connections are secure. Sometimes, it’s just a loose wire.
- If the light is flickering, it could be a sign of a bad connection or a faulty bulb. Try replacing the bulb or redoing the wiring.
- If the light is too bright, consider using a dimmer switch or a lower-wattage bulb. You want a nice, soft glow, not a spotlight!
And that’s it! You should now have a beautifully lit Japanese lantern, all thanks to the magic of LEDs. Enjoy the ambiance!
Setting Up Your Solar-Powered Japanese Lantern
Setting Up the Solar Panels
Getting your lantern to soak up the sun isn’t rocket science, but it does take a bit of trial and error. First, find a spot that gets full sun for at least six hours. Mount the panel on a stake or attach it to a fence—whatever keeps it stable and angled toward the sky.
- Clear the area of leaves and dust.
- Secure the panel at a 15–45° angle facing south (in the Northern Hemisphere).
- Lock the mounting bracket so it won’t spin in wind.
| Sunlight Hours | Nighttime Light (hours) |
|---|---|
| 4 | 6 |
| 6 | 8 |
| 8 | 10 |
If you’re more of a visual learner, check the setup instructions for a quick video demo.
Keep the panel surface clean and free of debris to avoid sluggish charging.
Make sure the panel spends at least 6 hours in direct sun for a full battery.
Automatic Activation and Manual Overrides
Most solar lanterns turn on by themselves at dusk—no flipping switches or remembering schedules. A light sensor inside detects low light and kicks the LEDs on. If you ever want to control it manually, look for a tiny switch or button, usually hidden under the base.
- Test the sensor by covering it with your hand and waiting a few seconds.
- Use the override switch to force on/off when you need extra light.
- Reset the system by toggling the switch off, letting it sit for a minute, then switching back on.
If the lantern won’t turn on, double-check that the battery is inserted correctly and that nothing is shading the panel during the day.
Mastering the Art of Candle-Lit Japanese Lanterns
There’s just something special about using candles in Japanese lanterns. It’s like stepping back in time, connecting with the history of these beautiful lights. Plus, the soft, warm glow you get from a candle is hard to beat. But, it’s important to do it right to stay safe and get the best effect.
The Art of Lighting Lantern Candles
Lighting a candle in a lantern might seem simple, but there’s a bit of an art to it. First, make sure your lantern is on a stable, level surface. You don’t want any accidents! Then, carefully place the candle inside, making sure it’s centered and away from the lantern’s sides. Use a long lighter or match to light the candle, being extra careful not to burn yourself. Once it’s lit, take a moment to enjoy the gentle flicker and warm light it casts.
Here’s a quick guide:
- Make sure the lantern is stable.
- Center the candle inside.
- Use a long lighter to avoid burns.
Extinguishing Candles and Aftercare
Candle safety is super important. Never leave a burning candle unattended. When it’s time to put it out, don’t blow on it – that can cause hot wax to splatter. Instead, use a candle snuffer to gently extinguish the flame. After the candle is out, let the lantern cool down completely before handling it. This will prevent any burns or damage to the lantern. Also, make sure to clean out any wax drippings regularly to keep your lantern looking its best.
Using candles in your Japanese lantern is a great way to create a relaxing atmosphere. Just remember to always be careful and follow these tips to enjoy the beauty of candlelight safely.
Conclusion
So, that’s pretty much it! Getting your Japanese lantern lit up can really change the feel of any spot. Whether you’re into the easy vibe of LED lights, the green side of solar power, or just love the old-school feel of candles, there’s a way to light things up that fits your style. Just follow these steps, and you’ll have your lanterns looking great and making your space feel super chill and inviting.
Read more: Understanding Hina Doll Cost: A Comprehensive Guide